
Owner : 🧛🏻♂️ - Mr. Sup3rN0va 01-April-2021
Tags : #i0S (📲), #android (📱), #pentesting (👨🏼💻), #tools (⚒), #cheatsheet (📜)
TABLE OF CONTENTS
RASEv2
- Stands for “Root Android Studio Emulators - v2”
- This is a toolkit to auto-install emulator and then root it
☝️ Back to top ☝️
Features
- Intuitive system tray GUI
- One-click download, android system images and building emulator
- One-click rooting
- Auto-Install PowerShell/Bash scripts for post-installation process
- Option to re-install burpsuite certificate
- Supports rooting from Android-v6 and above
- Supports both Windows and Linux(Ubuntu) platforms
- Colorfull installation console logs
- Powershell/Bash scripts have argument based auto-completion feature
- Now works in Kali Linux running inside WSL2 in Windows 11
☝️ Back to top ☝️
Pre-requisites
WINDOWS HOST
- Download latest Android Studio and Python from Internet
- Windows Terminal can be downloaded from Microsoft Store free of cost. It will prompt you to sign-in but you can close the window
-
Once all the above are downloaded, open downloaded ‘Windows Terminal’ and copy-paste
pip3.exe install -U pip rich pyqt5 pyqt5-tools wget --user --no-warn-script-location - Please run the above command twice because first run will not download all the pip dependencies
-
Once done, run this
Set-ExecutionPolicy -ExecutionPolicy Bypass -Scope CurrentUser
☝️ Back to top ☝️
Install Python
-
Run the python installer and you will see this

Uncheck "Install Launcher for all users"andCheck "Add Python 3.9 to PATH"and then clickInstall Now- This will not prompt you for
UAC
☝️ Back to top ☝️
Install Android Studio
- Double-click the installer and you will get the
UACprompt. ClickYes - Hit Next > Next > Next > Install
-
Once the installation is over, click
Nextyou will see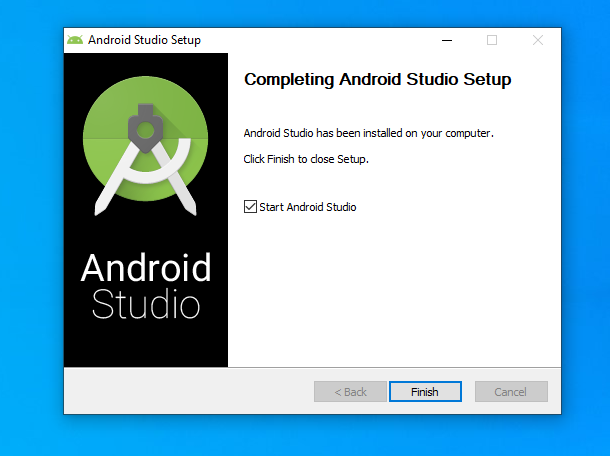
- Click
Finish - After this, it will prompt you again, click
Do Not Import SettingsandDon't Sendand then Next > Next > Next > Finish -
Then you will see
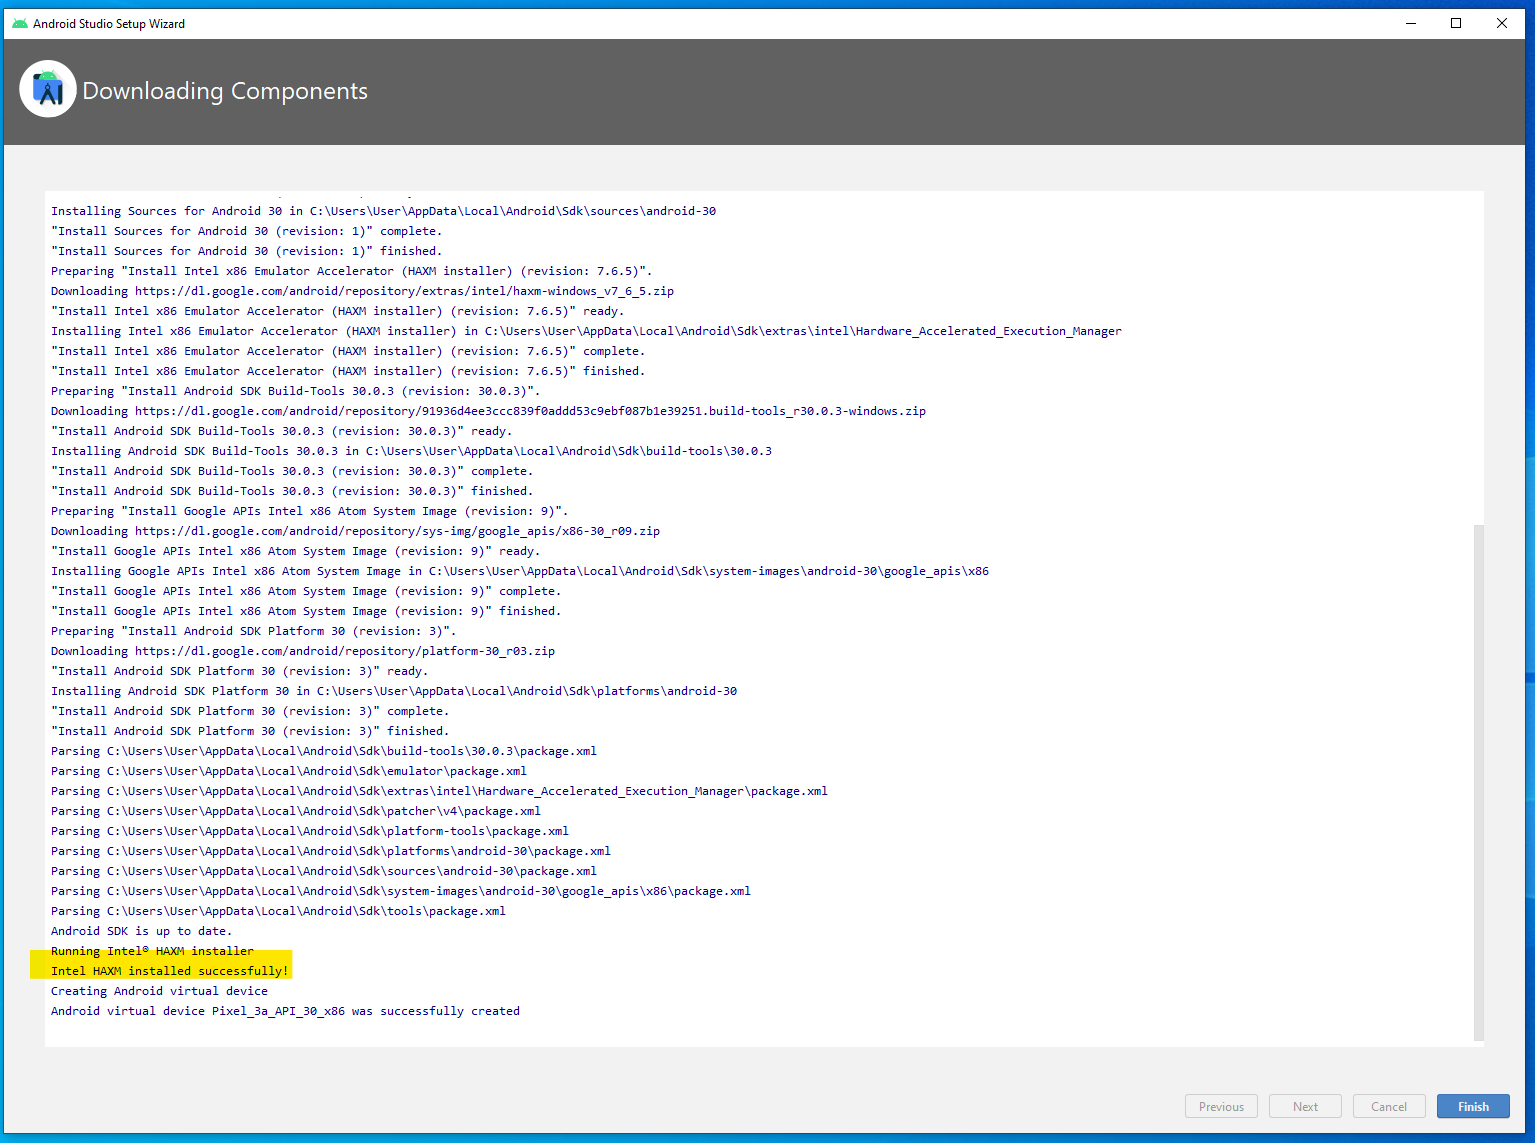
- Make sure that you have
HAXMinstalled, else emulators will not boot (See the image above). ClickFinish -
After that you will see this

-
Click on
SDK Managerand follow the screenshots below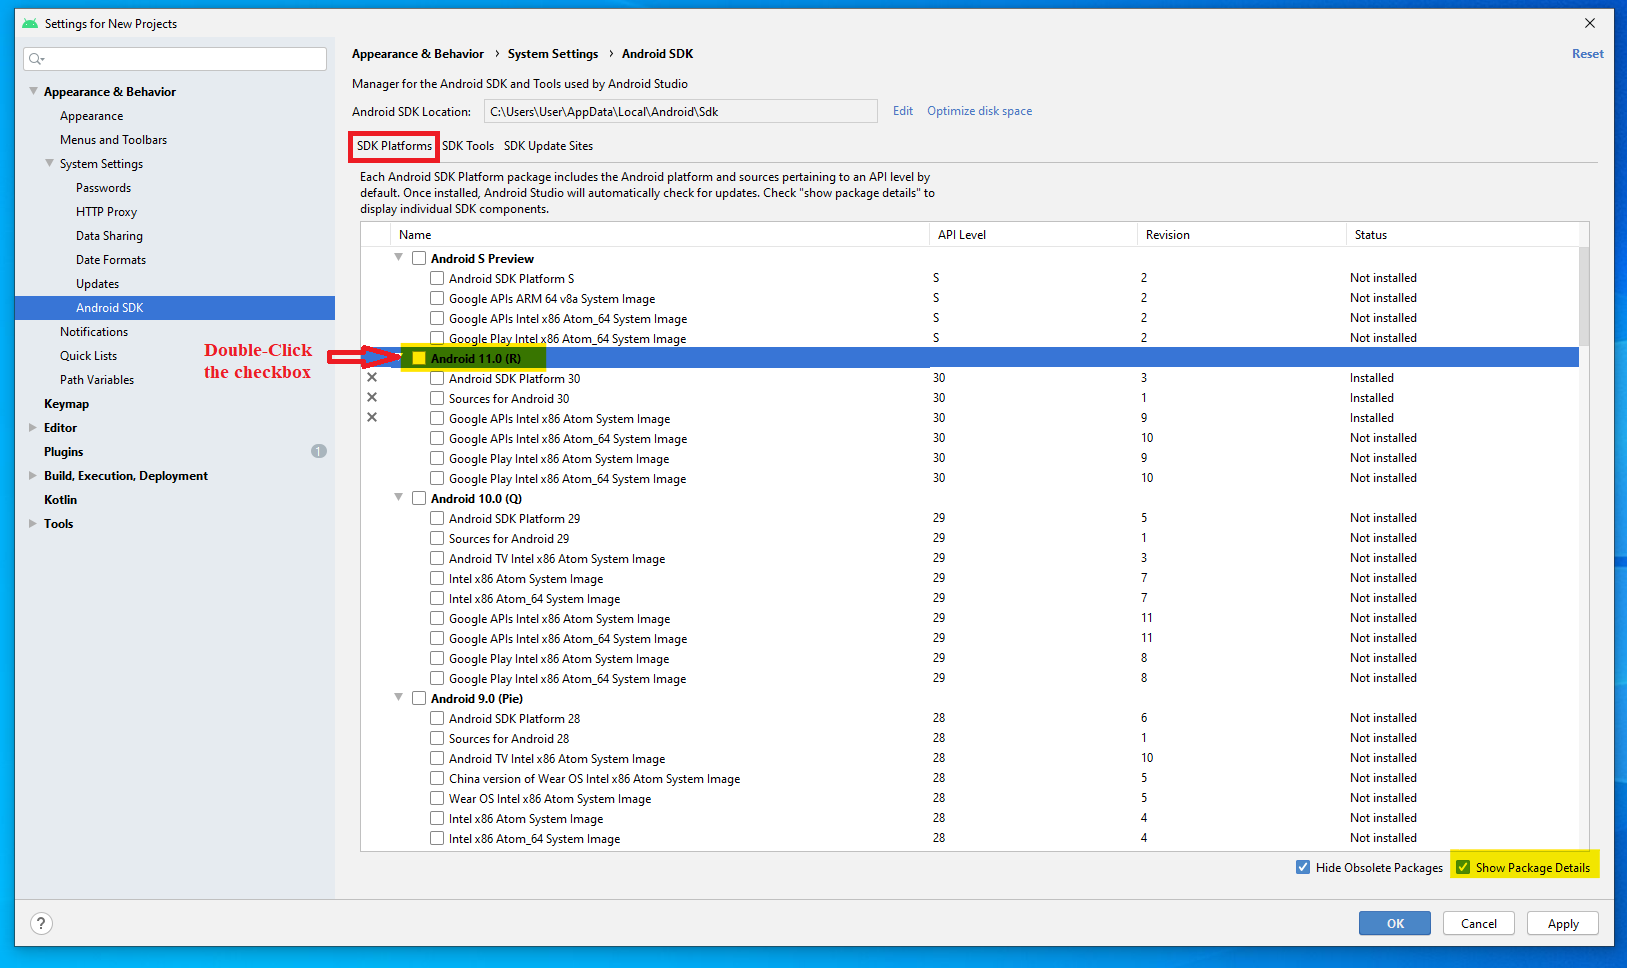
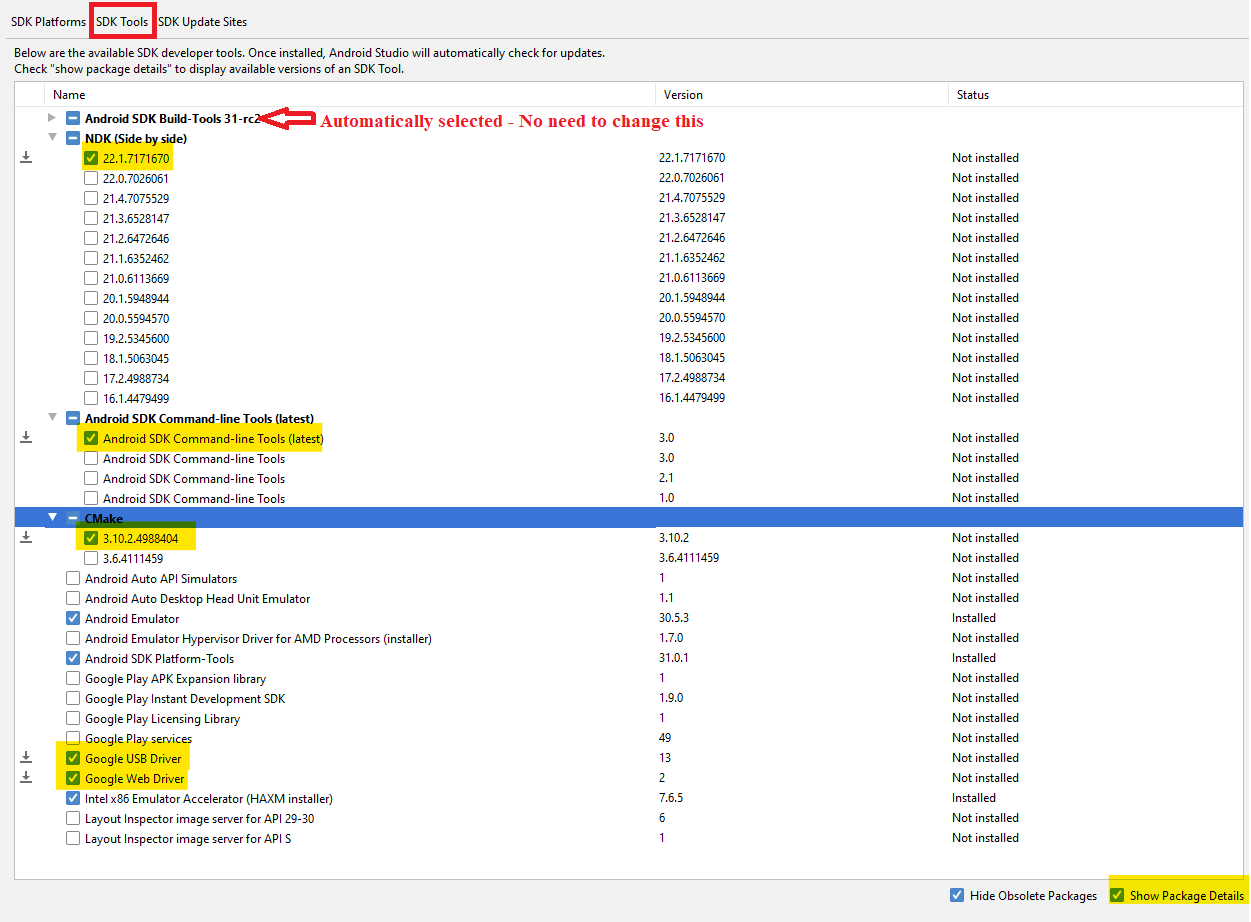
Make sure that none of the softwares of
Android 11.0are selected from first image and from second image check all highlighted and then clickOKand againOK -
Then you will get this

This will remove and install all the packages. Once done, click
Finish -
Then you will get this
-
Open
SDK Managerand it should look like below screenshots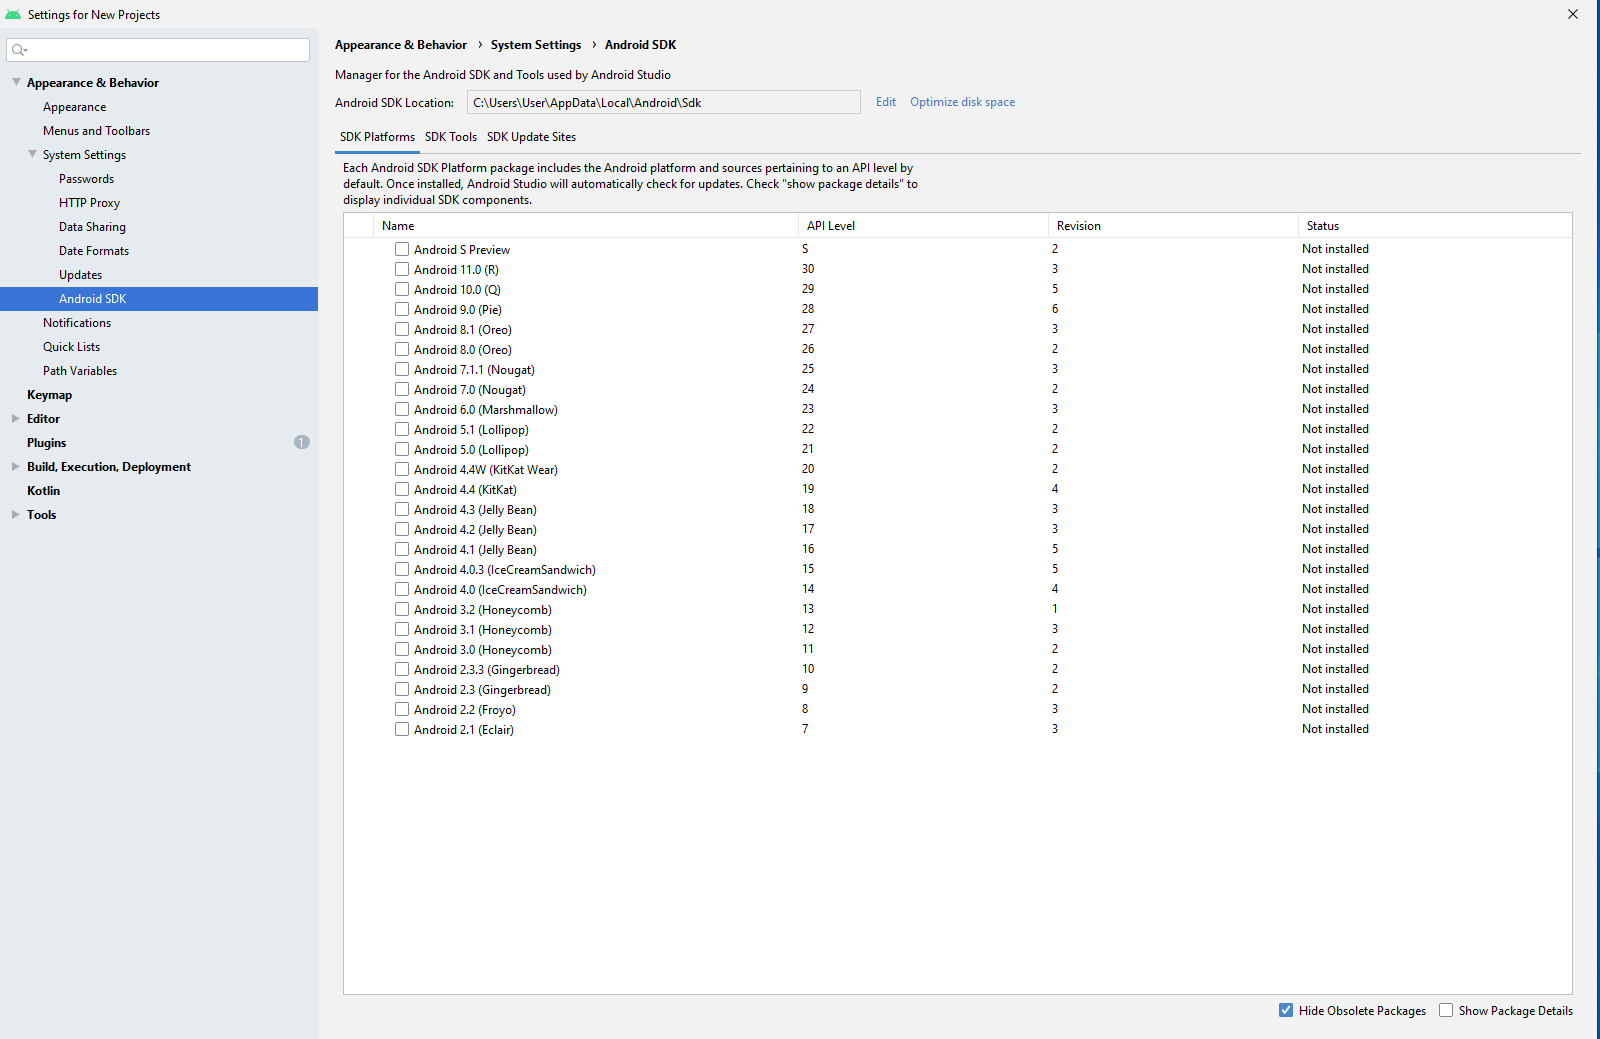

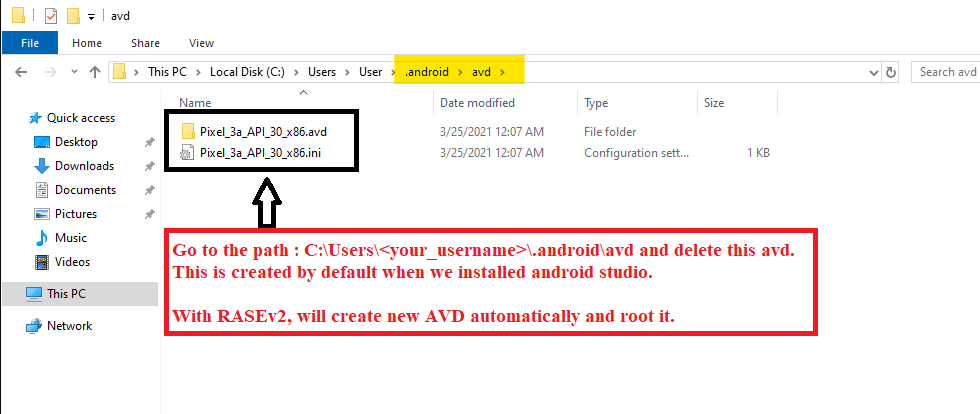
- Close
Android Studio - Also because we will be creating our AVD’s from the script, so we need to delete the AVD created at the time of
Android Studioinstallation -
Check below screenshot for that
☝️ Back to top ☝️
LINUX HOST
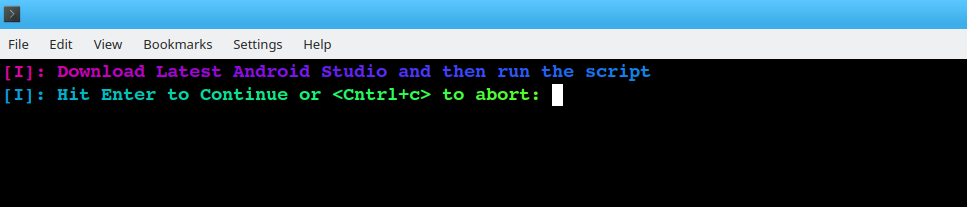
- Download the latest Android Studio from Internet
- Download the RASEv2-Linux.tar.gz
-
Extract it and you will see

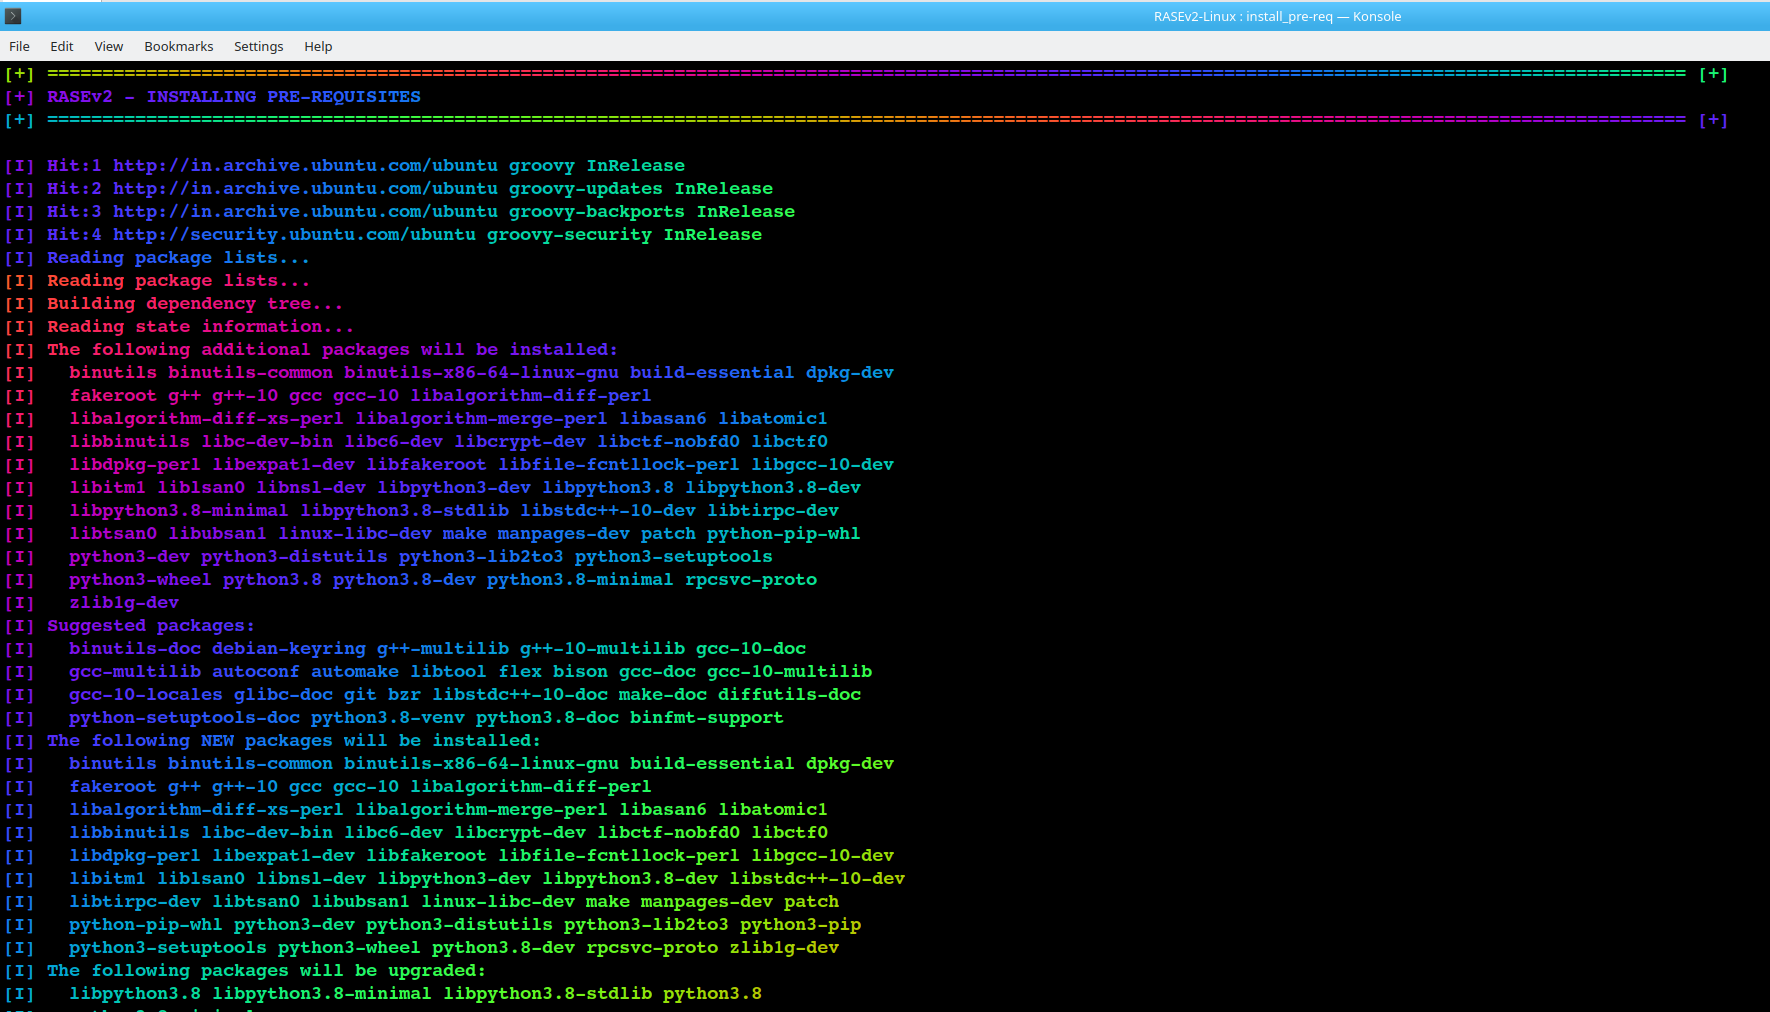
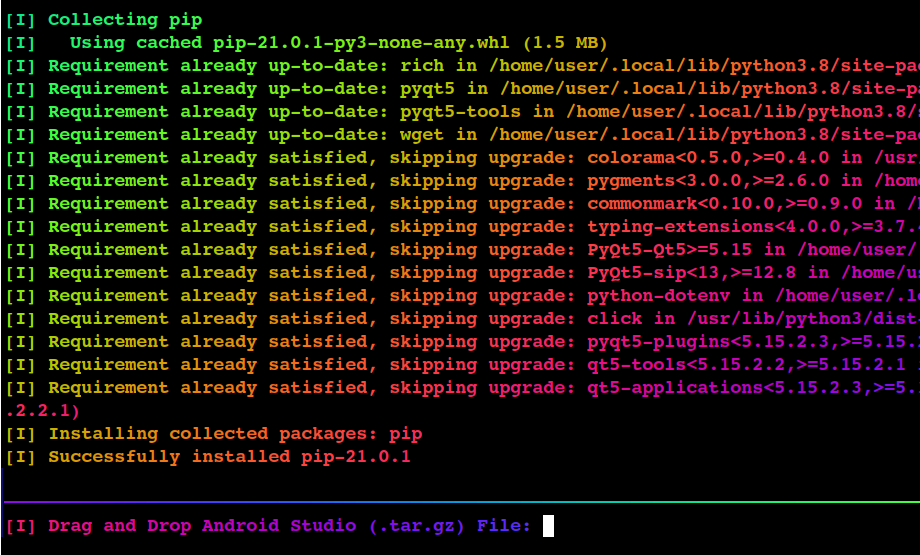
- RASEv2 has
install_pre-requisitesscript which will auto-install all the dependencies and also set Android Studio for installation -
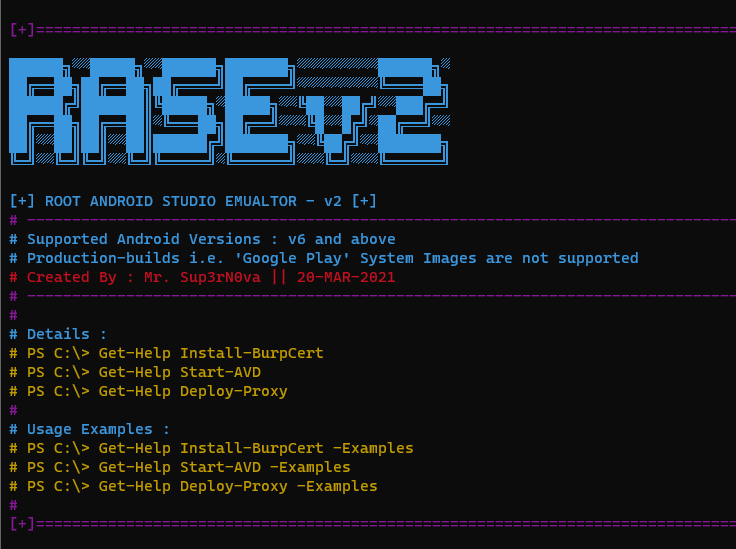
Run it and enjoy the rainbow 🌈:wink:
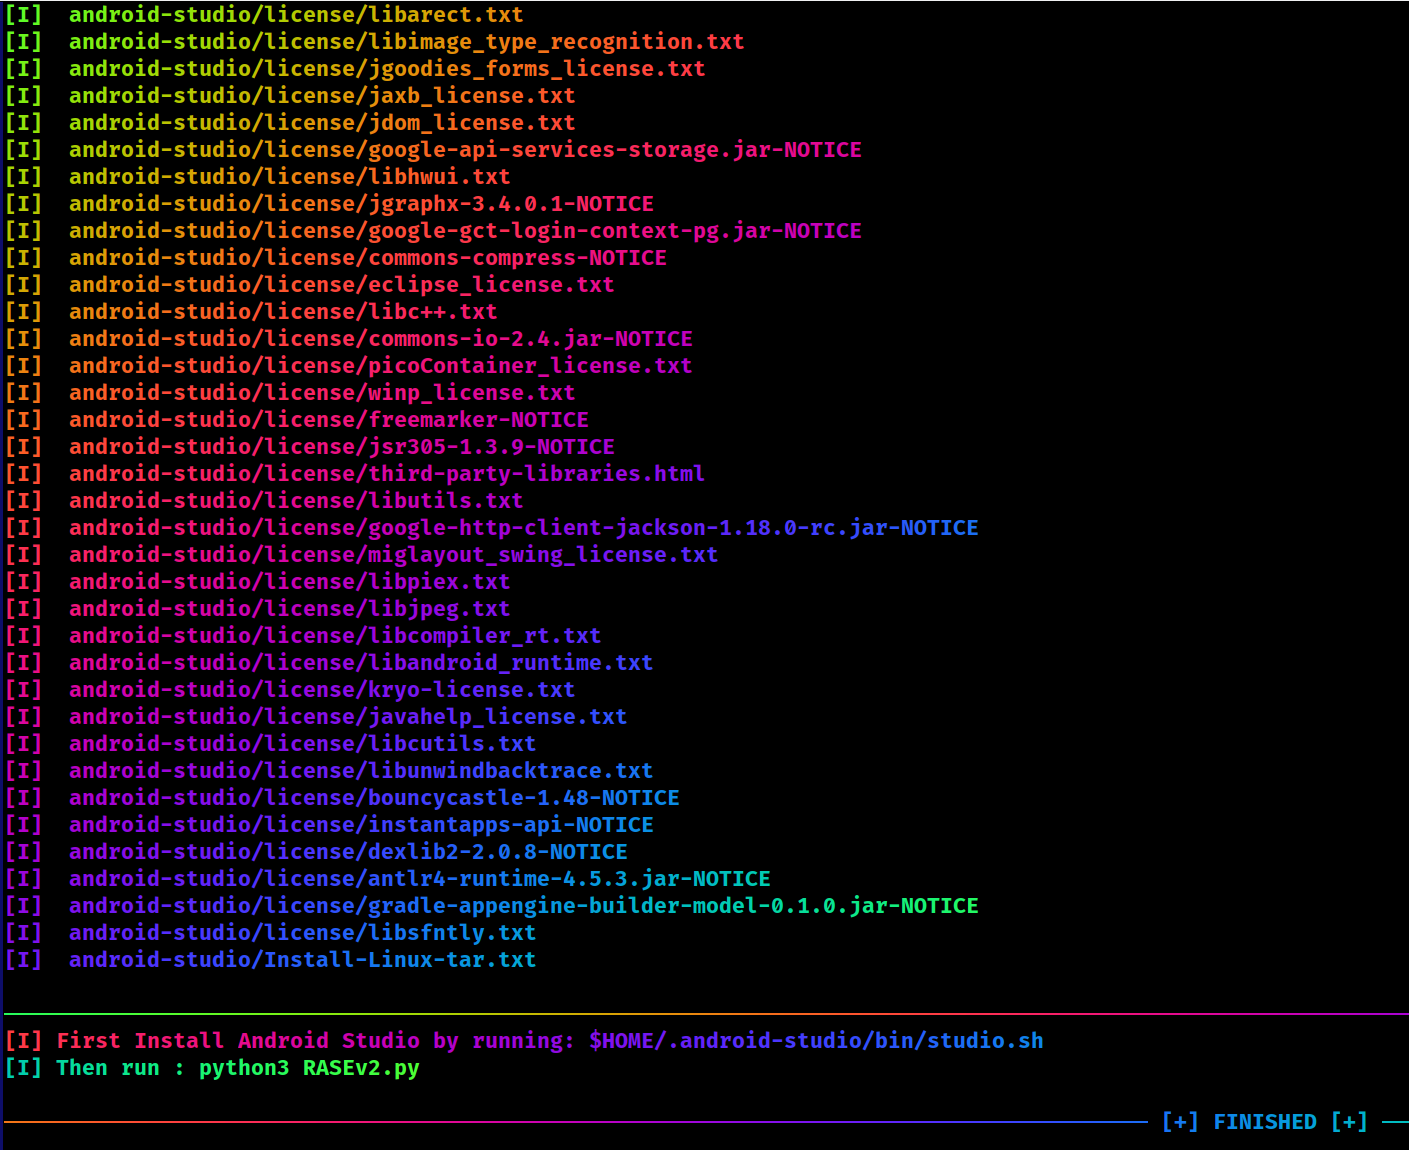
- After this as per above screenshot run
$HOME/.android-studio/bin/studio.shand the installation steps are similar to how we install Android Studio in Windows starting from bullet point - 5 - In Linux, default AVD is created in
$HOME/.android/avd. You can delete it as we did in windows and we will be creating AVD’s via script
☝️ Back to top ☝️
Usage
- From here the steps are same for both Linux and Windows
- Run
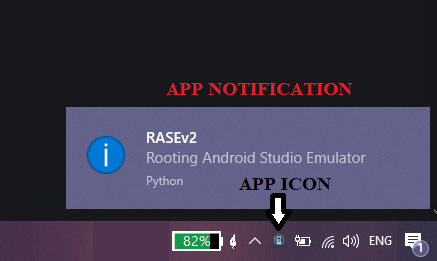
python RASEv2.py -
This will pop a notification and a system tray application starts
-
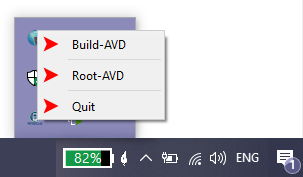
Right-click the system tray icon and you will have your options
-
Click on
Build-AVDand it will prompt you to checkAVD PathandAndroid SDK Path. If you have done default Android Studio installation like mentioned above, then we are good else you need to go to yourRASEv2and insideconfigs\config.json, you will get default paths which you need to update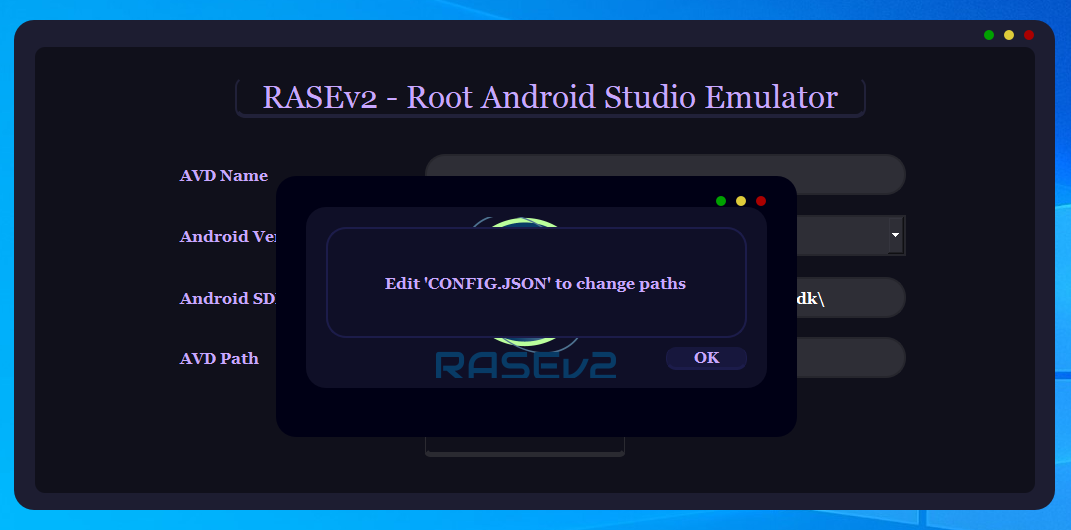
-
Hit
OKand you will have yourBuild-AVD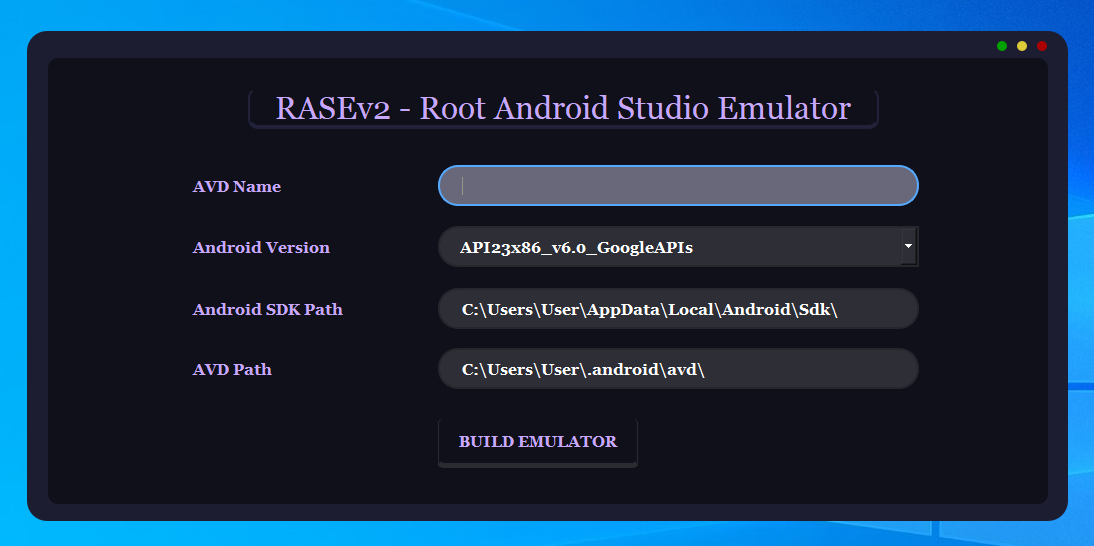
- Right now it has four android versions support
API23x86_v6.0_GoogleAPIsAPI25x86_v7.1.1_GoogleAPIsAPI27x86_v8.1_GoogleAPIsAPI28x86_v9.0_GoogleAPIs
- This is because my thought process was more focussed towards pentesting, so this will suffice the requirement but the support can be extended till the latest
Android VersionsthoughNot-Tested - Paths as I mentioned earlier can be changed from
config.json. So, we just have to giveAVD Nameand select the version and the tool will auto-download the system image for that version and build the emulator -
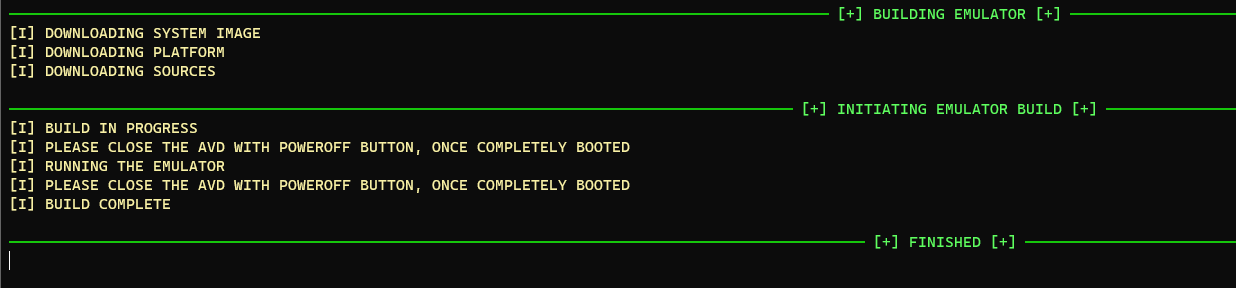
This looks like

- It will prompt you to close the emulator multiple times so that the script can adjust the look and feel of the emulator
-
Once done, you will have a auto-configured emulator ready to get rooted
- For rooting the emulator, close the window and click on
Root-AVDfrom system tray icon -
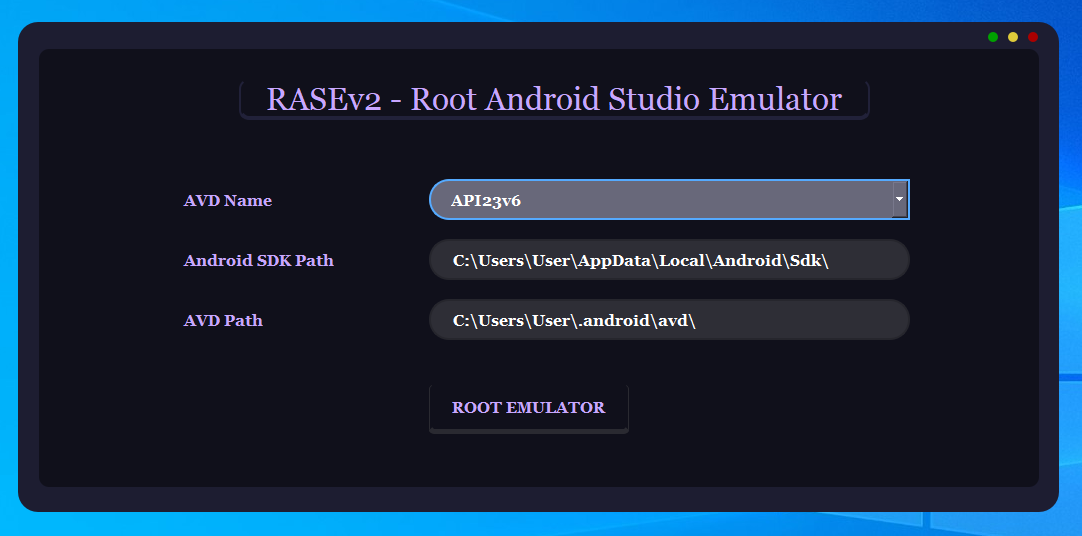
This will bring you rooting window
-
Here the
AVD Nameis a drop-down menu which will automatically gets populated based on the AVDs created. Select which AVD you want to root and clickRoot Emulator
NOTE : Most important point here is to add burpsuite certificate in ‘toinstall’ folder, else the script will fail
- Once you are done, you can quit the app from system tray
☝️ Back to top ☝️
Usage - Windows
- As per above screenshot, you need to restart the terminal and open
POWERSHELLand runRASEv2 -
This will look like
- Best part about all the above scripts are that they will be auto-loaded when you start powershell and also they have argument based autocomplete feature which means you don’t have to type the command at all because
TABBINGwill complete your command, even the emulator names
☝️ Back to top ☝️
Usage - Linux
- It’s same for linux as well but I guess it looks much better in linux
-
Restart the terminal and run
RASEv2
☝️ Back to top ☝️
BIG SHOUT
- GUI Inspiration : Wanderson - Youtube
- The designs will not be possible without his tutorials 👍
☝️ Back to top ☝️